Showing posts with label projects. Show all posts
Showing posts with label projects. Show all posts
20.3.14
Diapers! - Tutorial
So I completely forgot how many diapers a newborn goes through. I borrowed newborn diapers from a friend when I had Theron, and I guess I didn't move him completely into my prefolds until he fit into both the infant size ones and the next size up -- because soon after Lula arrived, I realized that I had about half the amount of infant size diapers I needed.
But-- they are prefold (flat) diapers. Seriously, how hard can it be to make them? Answer: not hard at all! And I actually sincerely hate sewing. So, for any of you who actually enjoy sewing, super easy project.
First, I found material. I used a large sheet we got at the local second hand market (kind of like a flea market) that was a kind of flannelish material. In retrospect, this was not quite as absorbent as I might like, so next time I make diapers (and I'll probably end up making more in the next size up), I would use either a thicker, more absorbent material, or I would double up the material to make a thicker diaper. Just a heads up.
So here's how I made them, complete with awesome instruction sketches. I know, I'm an amazing artist.
I used one of my store-bought infant-size prefold diapers as a pattern. I cut the sheet into strips that were as wide as my diapers were long (1), and then cut those strips into pieces that were 2 and 1/3 times the width of my diapers, so that I could double them over with the middle third overlapping for extra absorbency in the middle (2).
I then folded the diaper (3), with the middle third overlapping, folded that middle edge over to make a clean edge, and sewed right along the edge (4). Then, I sewed on the other side of that middle third, to make a strip down the middle that was three fabric pieces thick instead of two (5). Finally, I hemmed the edges (6).
That's it! How easy, right? I used sharpies to decorate them, and had quite a good time doing so. You could also sew a strip of pretty material down the outside of the middle, but I was oh-so-done with sewing. Have I mentioned that I hate to sew? This project was definitely a labor of love. And a strong desire to have enough diapers.
Here are some of my favorite sharpie designs:
Other family members got in on the fun, too.
Here are some of Grandma's:
And Daddy did one:
Even Big Brother participated!
After several washings, the gray and brown sharpies have definitely stayed the best, hardly showing any fading or smearing. The turquoise was by far the worst, most of it just washed right out. The other colors have faded a little, with the lighter and greener colors doing worse and the darker and reds/yellows doing better.
When I was taking pictures for this post, Lula was fast asleep, so I drafted Richey the... Giraffe? We've never decided exactly what animal he is supposed to be. But I drafted him to model a diaper.
In summary:
-Very easy project that even someone who hates sewing can complete in a couple hours.
-I would use a more absorbent cloth next time, or double the material.
-I would use only gray, brown, red, purple, and yellow sharpies next time to decorate. (or get fabric pens, if I lived in a place where I could get those)
-I now have enough diapers. It is wonderful.
2.1.12
Tea Bags
Look at that little tea bag. Isn't it adorable?
Ok, perhaps I'm biased, because I made that tea bag with my own little hands, but still.
I was drinking jasmine tea this morning with my breakfast (which happened to be homemade yoghurt and chai spice granola). The jasmine tea I have is loose-leaf tea, and is very good. However, I was having some trouble with my little tea strainer... it is a bit handle-heavy to sit on my tea cup like a good little strainer, so it tends to flop out, catapulting wet tea leaves along the way. This situation does not lend itself to a happy, relaxing breakfast.
I saw homemade fabric tea bags on pintrest the other day, and I decided that now is the time to make some. Guess what? I'll even show you how I did it! Alternatively, you could just buy them in my etsy shop. =D
Ok, first of all, I found a really lightweight cotton and cut a rectangle out of it, about twice the length of a tea bag. I stitched a heart on it, where the middle of the front of the bag is going to be. You can put whatever you like on the front of your tea bag... or just leave it plain... up to you!
Isn't it a cute little heart???
Then I folded my little rectangle in half, right sides together, and stitched up both sides to make a bag. I double stitched it, for extra awesomeness.
Still inside out, I folded over the top for the place where the drawstring is going to be.
I put the drawstring in the fold to make sure it was going to fit, and then stitched around the bottom of the fold. Make sure not to catch the drawstring in your stitches! It doesn't work then....
Also, leave a hole for the string to come out of.
I sewed one end of my drawstring down then, so that I only have one string coming off my bag. See the little end of string peeking out there?
Turn the bag right side out now.
I tied a button on the end of my string, for extra cuteness, and so that the string doesn't follow my tea bag into my cup of tea.
And there you have it! An adorable, reusable, eco-friendly tea bag! Put your loose-leaf tea in it, pull the drawstring tight, and you are ready for your cup of tea.
To clean it, just pull open the drawstring top (you might have to work it a little since it will be wet at that point), turn it inside out, and rinse it. Hang it up to dry.
And, you know, if you don't want to make one but you are just dying to get your hands on one, then they are in my etsy shop here: http://www.etsy.com/listing/89620062/reusable-tea-bag-stiched-heart-on-cotton
Happy tea-bag-making!
6.10.11
Autumn is (sort of) here
Well, as I said in my previous post, fall is coming slowly to Oklahoma City. What is the problem with this, you might ask?
Well, I really like fall. Especially fall leaves.
I love their crunchiness when I jump on them.
I love their brilliant colors peeking up at me from the corners of the street as I walk to school.
I love chasing them as they somersault down the alley, barely touching the ground as they go, a little piece of skipping happiness, coloring in the dreary cold city world.
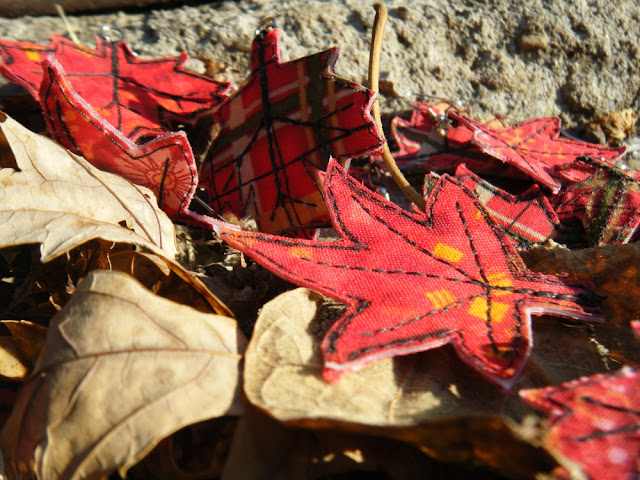
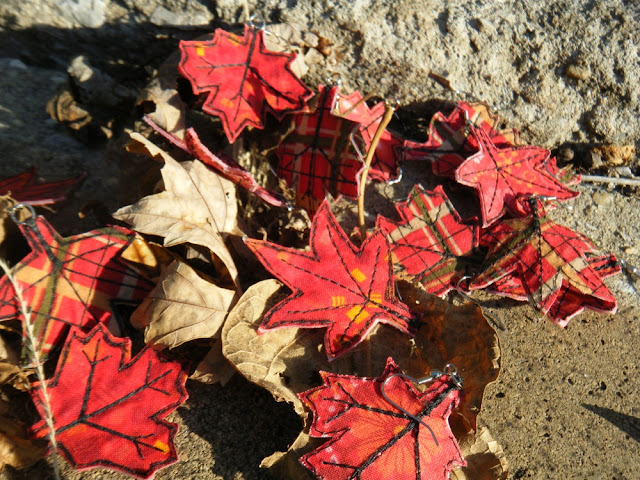
But the trees are stubbornly refusing to produce more than the random handful of colored leaves so far. So I decided to hurry things along a little. Morgan and I pulled out my favorite bright fall-colored fabric and our old milk jug (for plastic to make them stiff) and made some fall leaves!
I loved them so much that I decided to wear them on my ears.
Forever.
Ok, maybe not forever, but for as long as I can claim that it is fall.
http://www.etsy.com/listing/83330431/brilliant-fall-leaf-earrings
I'll bet you didn't even know that I had an Etsy site, did you?
Well, I did.
Do.
I do have one.
I just haven't posted anything on it for a while. But I'm planning on that changing, I have some cool ideas. Maybe they will sell, I hope so. We'll see. But at least I have fun making them. And wearing them.
Pretty autumn leaves. Happiness in my heart-place.
18.8.11
My House Part 2
So now that you have waited oh-so-patiently a couple of days (ok, so I didn't get to blogging on my to-do list yesterday), I will now deliver the "after" pictures.
Here is the living room, from the same view points as the before pictures:
Here is the bathroom (again, same view point):
Kitchen:
Dining room:
Bedroom-- there were no before pictures of the bedroom because our landlord's stuff was stored in there and we couldn't even get into it until three days before we left for our wedding. Hence, by the time we got into it, I was so panicked about getting it done that I didn't think to take pictures. Trust me, it was a mess.
The spare bedroom and the pantry don't need to be included yet because they are currently being worked on. My family (hi family!) is coming in a couple of weeks to stay with us so we are frantically trying to make a place for them to be able to stay. It's coming along fast though, so pictures of that will be up soon.
My mother-in-law (hi mommyinlaw!) helped me with painting in the pantry today. That was so much fun because it was 103 degrees today, our house doesn't have air conditioning, and the pantry especially has no airflow at all. Also, the only painting-pants I have are jeans, so I was wearing jeans. Fun fun. At least I wasn't doing it all by my lonesome! =]
So there you go, the house transformed. I hope you enjoyed this series, tune in next time for more of whatever I come up with to write about!
Subscribe to:
Posts (Atom)


