Showing posts with label bread. Show all posts

23.1.14

Kaukau (sweet potato) Bread

No comments:

One of the staple (read: cheap) crops here is a root called "kaukau." This is very much like an overly starchy sweet potato. Certainly not the worst staple I have come across in my days overseas … much better in my opinion, for instance, than kasava, which pretty much tastes like that glue paste that you weren't supposed to eat in kindergarden. Only a little blander. And stringier. But I digress.

Noting the similarities between kaukau and sweet potatoes, I decided to try an experiment of substitution. And, unlike some of my cooking experiments, this one worked! So for those of you not in the highlands of Papua New Guinea, just substitute sweet potato back into the recipe if you for some strange reason cannot find kaukau.

Original source of recipe: http://thefreerangelife.com/sweet-potato-yeast-rolls/

Ingredients
4T butter
1c mashed (cooked) kaukau
3/4c water
2T honey
3 eggs
1T yeast
4-5c flour
1tsp salt

Note: if using kaukau, I add about 1/4 cup of the cooking water back into the mashed kaukau because it is so much drier and starchier than sweet potatoes. Also, I use the rest of the cooking water as the "water" in the recipe.

Warm water, kaukau, butter, and honey in a saucepan or the microwave until butter is almost melted.
Add eggs, yeast, and 1c of flour and beat into submission, or until smooth.
Add 2 more cups flour, and stir well. Add as much more flour as you need to make a smooth soft dough.
Let rise until doubled.
Divide into 2 or 3 buttered loaf pans, or shape into french loaves, and let rise until very puffy.
Bake at 350F (175C) for 20-30 minutes or until light golden brown.
Let cool in pan for a while, then transfer to cooling rack or mouth.


17.6.13

Aunt Martha's Cinnamon Rolls

No comments:
In my husband's family, these cinnamon rolls are a traditional treat. He and his brother used to request them for their birthdays. I got the recipe from his mom when I was setting up my kitchen. Evidently Aunt Martha is my husband's great-aunt... who makes good cinnamon rolls!


Cinnamon and sugar are generously spread on a lightly sweet dough.


Rolled up, cut into fat little cinnamon rolls.


Placed into what you may have realized by now is my favorite purple pan.

Risen, baked, and eaten with much enjoyment!


Aunt Martha's Cinnamon Rolls (printable recipe)
1package yeast (or 2 and 1/4 tsp)
1/4 c lukewarm water1 c milk
2Tbs butter
1/4c sugar
1tsp salt
1 egg
4c flour
1/4c sugar
2Tbs cinnamon

Dissolve yeast in lukewarm water.
Scald milk. Add butter, sugar, and salt. Cool to lukewarm.
Add egg, yeast, and 1 and 1/2 c flour to milk. Stir well. (or, if you have a mixer, beat for 2min on #2 speed)
Add 1/2c flour. Stir well again.  (or beat another 2min)
Stir in remaining flour by hand. Place dough in clean, greased bowl.
Let rise to double. (about an hour)
Knead, and roll out with rolling pin to 18" square.
Melt butter, spread on dough.
Sprinkle with sugar and cinnamon.
Roll jelly roll fashion, cut into cinnamon rolls.
Place in well-greased (and floured) pan.
Let rise to double (about an hour).
Bake at 450F  (230C) until dark golden brown -- about 15-20 minutes.


12.7.12

Herb Bread from yeast starter

No comments:


I've never been much of a gardener. When we were growing up, my brother used to forbid me to even look at his tomato plants, because he believed that if I looked at them they would die. It probably was not an entirely unfounded belief.

I think that my stunning lack of success as a gardener is closely tied to my scatterbrained personality. I just... forget that I have plants to take care of. I water them and weed them and help them tenderly along and then the next time I remember they exist it has been two weeks and they are dried, shriveled little shrubs of themselves, overtaken by the more hardy weed-plants that don't need my care or protection.

I do have a solution to this problem. I learn to like the weeds. I pretend that the four-o-clocks that have taken over my front flower bed are gorgeous, and what I wanted there all along. Stickers? Builds character.

But I haven't entirely given up on the idea of my own garden filled with real plants that I actually planned to be there. I keep trying. And I'm getting better. For example, my herb garden this year was not entirely a bust. Granted, the basil is kind of... sad. And the rosemary insists that life in my garden is just not worth living. But the parsley is doing GREAT. ... uh, what do you do with parsley? Lots and lots of parsley?

Anyway, it came to my attention the other day that I actually had quite a few herbs in my garden, and I decided that the time had come to put them to work in my kitchen. Why else grow herbs? Exactly. So I made this delightful herb bread, and I thought I'd share.

If you've been reading my blog for long, you know that I grow yeast starter. I like the flavor better, and it's cheaper than store bought yeast. So this bread is made from starter, and I explain how to make said starter here: http://lifebydanielle.blogspot.com/2011/09/pet-yeast.html


I keep my starter in the fridge so I don't have to use it every day, so before I made this bread I pulled the starter out of my fridge and let it warm up for a while until it was all bubbly again, then poured about 2 cups of starter into my mixing bowl.


Herbs from my garden. This is all that I used in the bread, and I made a lot of bread. Fresh herbs are quite strong.


Chop chop chop. And crack some pepper too.


Pile flour on the starter.


Add some herbs. And salt. And warm water. Not much water, just enough to make a shaggy but rather stiff dough.


Knead, knead, knead the dough until it is smooth and elastic.


Olive oil all over the dough and let it rise to double. Then shape the bread how you want it and let it rise to double again before baking it.
Now, I have no pictures of my first batch of bread, because, true to form, I forgot all about the bread in my oven and it became large croutons. But the rest of my dough became nommy, lovely calzones with cheese and ham and onions in the middle of it. And I do have pictures of those.


Herb Bread

2 c starter
some fresh herbs and cracked pepper and garlic
salt (about 1 to 2 tsp)
3 c flour
about 1/2 cup warm water

Chop up the herbs. Mix the starter, flour, herbs, and salt. Add enough water to make a stiff, shaggy dough. Knead until smooth and elastic, about ten minutes. Coat liberally with olive oil and let rise to double. Punch down and shape into bread loaves, calzones, etc. Allow to rise to double again.
Bake at 400 degrees F for about 20 minutes, or until slightly golden. Eat happily.


3.3.12

Buttermilk Biscuits

1 comment:


Well, it has been quite a while since I have posted on here... since before school started back up, actually.
You can blame school for the lack of postings. Turns out, 20 hours is actually quite the load of work. Keeps me kind of busy, most of the time.

In any case, I finally had a free-ish Saturday afternoon and was making biscuits and so I thought I'd take some pictures. And, I mean, once you take pictures you really do need to post them, right? Of course right.

I have been for quite some time now trying to find a perfect biscuit recipe. I love biscuits. LOVE them. But my homemade biscuits always have left a little something to be desired.
This recipe doesn't rise enough.
This one is too dense.
This one is too bitter (that is a problem with a lot of them. The baking powder makes them bitter.)
 My sourdough starter hates me, and I forget that it exists until it is so far past "sour" that it really isn't funny.
No, it isn't.
It's nasty.
But finally, recently, I found Biscuit Utopia. Beautiful Buttermilk Biscuits. They are not bitter. They rise like little puffy pillows of biscuity goodness. They are flaky and pull-apart-and-load-with-butter-able. (that is a very important biscuit characteristic). And they are easy to make. And I'm going to show YOU how to make them!!! Aren't you lucky.

I found and adapted this recipe from http://simplyrecipes.com/ which has lots and lots of wonderful noms.

Like all good biscuity recipes, you first mix together the dry ingredients. And then you ADD BUTTER. Or margarine. Margarine is cheaper. But butter is nommier. Is nommier a word?


Then you chop that butter all to pieces with your handy dandy butter chopper.
I use my butter-chopper a lot. That's why it's all bendy.
Bendy Butter-Choppers don't work as well as you might wish them to.
I need a new non-bendy butter-chopper. 


Now, don't chop the butter into too fine of pieces. You want that butter to be in big enough chunks that those chunks can turn into flaky bits of goodness later on. Chunks about the size of... medium-size chunks.
Maybe ranging from pea-size to thumb-size. Yeah, that's about right.
Then you add buttermilk!


Now, before this recipe I had never used real cultured buttermilk before. I found this on sale at Crest for 99 cents per half-gallon and I thought I'd try it. I really like it! I think that the buttermilk might be the secret of these biscuits' extreme goodness. I read online that you can make cultured buttermilk by mixing some store-bought cultured buttermilk with some regular milk and letting it sit out for a while, so I'm going to try that and we'll see if it works. I'll let you know. If I remember...

Anyway, moving on. You mix the buttermilk in, but don't over mix it! It will be very crumbly. This is good. Too much liquid makes the flour release gluten, which makes things chewy and will make your biscuits un-flaky and tough. Don't add too much, and don't mix too much.


Now, you are going to make flakes in your biscuits. Dust the counter with flour and dump your clumpy dough on the counter. It will try to fall apart. You are going to gently corral those clumps and press them lightly together and down into a sheet of crumbly goodness about two inches high.


Now, fold (I use the term loosely... more like, flop) the dough in half, and press gently down again to the same height. Do this about three or four times, until the dough starts to stick together better. This will make flakes in your biscuits. You are about done when the dough looks like this:


Remember, you aren't kneading the dough. You are gently flaking it. On the last turn, put some flour on the top of the dough before you fold it, and press it down to half the height you have been. Then fold it for the last time and just barely press it together. This last fold will create the half-way flaky point so that when you pull apart your fresh, warm biscuits, they will fall beautifully in half and await buttery goodness and honey and jam.

Now, cut out the biscuits. Press firmly straight down on your biscuit cutter (in my kitchen, that means "drinking glass that I use to cut biscuits with"). Don't twist the cutter or you will seal the edges of your biscuits, and they won't rise to full flaky glory. Set the biscuits on an ungreased cookie tray. Don't worry if they want to fall apart in half. Just stack those halves on top of each other and pretend like they are behaving.


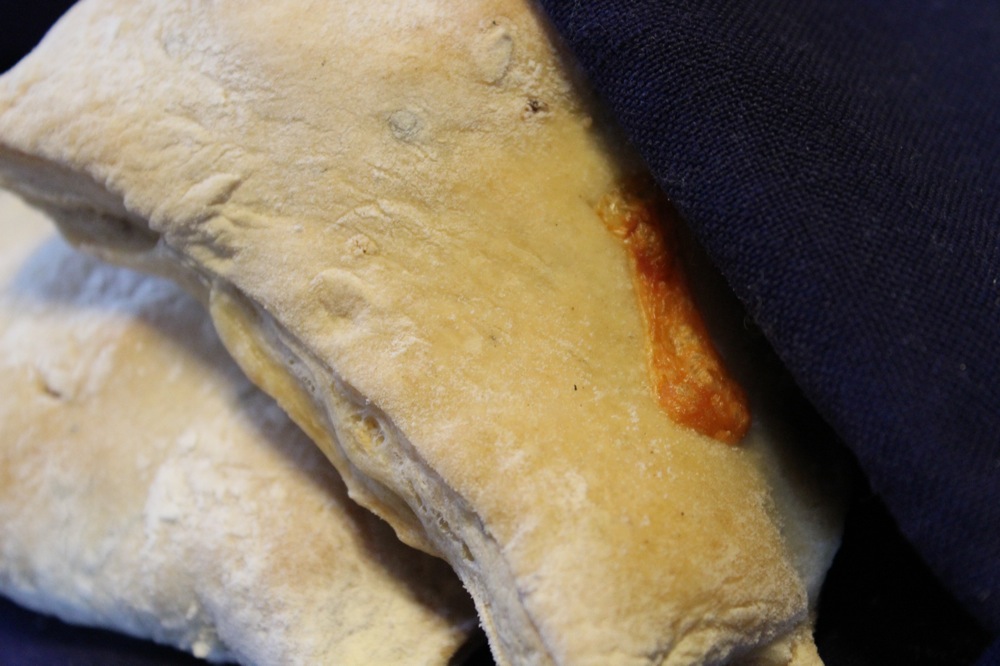
Bake these at 450 degrees Fahrenheit for about 15 minutes, or until the tops are crispy golden brown.
Use a spatula to scrape them off the pan.
Add butter. Or jam. Or both. And honey.
And eat them all.
Or share.
Your choice. 


Buttermilk Biscuits

2 1/2 cups flour
1 Tb baking powder
2 tsp sugar
3/4 tsp salt
8Tb butter or margarine
1 cup buttermilk

Preheat oven to 450 degrees Fahrenheit.
Mix the flour, baking power, sugar, and salt.
Add the butter or margarine, and cut in until crumbly.
Add buttermilk. Mix until the dough clumps.
Turn out on floured counter, and press into 2-inch high sheet.
Fold and press, repeating until dough sticks together.
Fold one last time, pressing lightly together.
Cut out biscuits, place on ungreased cookie sheet.
Bake for 15- 20 minutes, or until tops are crispy golden brown.
Enjoy!

21.12.11

Bread Pudding

No comments:

Hey guess what?
It's almost Christmas.
Hey, don't look at me like that. I'm just saying.
And offering the proximity of Christmas as a sort of explanation of my choice of recipes for today. Because everyone knows that bread pudding is a Christmassy sort of food.


So, have mercy on that loaf of stale bread and redeem its existence by making this nommy bread pudding. And vanilla sauce. Please don't forget the vanilla sauce.


Two loaves of bread, chopped up into cubes.
Drizzle melted butter over the bread, and toss together. 
In another bowl, mix milk, eggs, sugar, spices, and vanilla.


Add the milk mixture to the bread, along with raisins. Toss together until all the bread cubes are wet, then let sit for 10 minutes to soak.


Put in greased pan, bake at 350 degrees for about an hour, or until when you press on the top, it feels firm.


Bread Pudding

Ingredients
2 loaves bread
6 lg. eggs
7 c. whole milk
1 1/2 c sugar
2 t. vanilla
1/3 c melted butter
1 c raisins
3Tb cinnamon
2Tb nutmeg

Directions
Preheat oven to 350 degrees. Butter a 9x13 dish, or a pie pan, or a bread loaf pan (whatever you like).
Cube bread, drizzle with butter. Toss together.
In another bowl, mix eggs, milk, sugar, vanilla, cinnamon, and nutmeg.
Add milk mix and raisins to bread. Toss together, let sit for 10 minutes.
Pour into buttered pad. Bake at 350 degrees for about an hour if in a loaf pan, or about 45 minutes in a shallow pan.


Vanilla Sauce for Bread Pudding

1/2 c sugar
1 1/2 Tb cornstarch
1c water
2Tb butter
2 tsp vanilla

Mix sugar and cornstarch in small saucepan. Add water, bring to a boil. Stir constantly, allow to simmer until it begins to thicken. Add butter, stir until melted. Add vanilla. Simmer until correct thickness.

15.9.11

Pet Yeast.

No comments:

I bake a lot.
A whole lot.
My friends will affirm this.
There are two problems with baking a lot. The first problem is that if you bake a lot, and eat what you bake, then you eat a lot of baked goods. Why is this a problem, you ask? Well, it isn't a problem for my super-skinny-never-gain-weight husband. But it is a problem for me, because if I so much as look at a piece of cake I can just feel the weight piling on. Oh, well. I will eat more salad later. Because baked goods are good for the soul. I just know it. And I care about my soul.

The second problem is that the stuff for baking can be expensive. Flour is cheap, as is sugar, but things like, say, yeast can be pricey. And when Morgan and I can put away two loaves of French bread in one day (yes, the two loaves in that picture are now history), if I used a package of yeast for every batch of bread, that would add up pretty darn quick.

But never fear. I have a solution. Because I am poor. And because I love to bake. And because I would much rather spend the money on new clothes AND still have the yeast to bake with. For free. Because free is better than not free.

So how do I get free yeasts, you may ask? Well, simple. I raise them. My pet yeasts. In a jar. In my fridge. Just waiting to be mixed with flour and left to consume sugar and toot out carbon dioxide and make my bread fluffy and full of bubbles. Yeast-toot bubbles. Yeah... I'm weird.

Let me show you how to raise yeast.

 1. Pick a cute jar. Important step. This jar will be your new pets' home. It must be cute.
2. Put into the jar
     1/4 package yeast
     about 1/2 cup of flour
     about 1 Tb sugar (if you want active yeast soon)
    about 1/2 cup warm water
3. Stir.
4. Let sit at room temperature until you see lots of bubbles, and the paste is doubled in size.

Now your yeast is happy and ready to use, and is equivalent to about a full package of yeast. You can put your jar of yeast into the fridge until you are ready to use it. When you want to use it, just pull it out of the fridge, stir it (it will separate a bit), and let it warm to room temperature (you will see bubbles again). Then, use in your recipe pretty much as you would packaged yeast. It may take a bit of practice to learn portions when using this as opposed to a package, but for the most part if you just substitute in a jar-full of this stuff, it works.

When you use this yeast, pour most of the jar into your recipe, leaving a small amount of paste sticking to the sides of your jar. Then, add flour and warm water again and let rise to double before putting back into your refrigerator.

In my experience, this takes just a little longer to rise than ordinary yeast, but not a whole lot longer. If it takes a really whole lot longer, then your yeasts are not happy and you need to help them... don't ask me how. My best method of yeast-rejuvenation has been to pour them out and start over. 

In a plain bread recipe, you will taste a very slight sourdough taste to the bread, which is extremely yummy. For breads like cinnamon roll dough, however, there is no added taste due to the homegrown yeast.

Since you no doubt will want to get started using your yeast right away, I will give you a basic recipe for plain french bread, which I make very often, and which gets eaten quickly. Very quickly.


 French Bread with Pet Yeast:
(2 loaves)
Ingredients:
yeast (about 1/2 cup)
3 c flour
warm water
salt
olive oil

Pour yeast into mixing bowl. Add about 3 cups of flour (I usually just pour in some flour till there is a little mountain of flour). Add some salt... around a teaspoon, more or less, depending on how much you like salt. Add warm water a little at a time while kneading it until you get a semi-stiff dough. This will be around 1 - 1 1/2 cups of water. About.
Knead until dough is smooth and elastic. Knead a long time. A really long time. Learn to love kneading. It's therapeutic. I learned that from my mom, who used to make bread when she was upset.
Put in a clean bowl and rub all over with olive oil. Cover with a piece of saran wrap (to keep the outside from drying out) and a kitchen towel.
Let rise to double, or until when you press your finger into the dough, it springs back very slowly.
Punch down, let rise again to double.

Now, divide dough in half and form two french loaves of bread. Long, skinny. Make them skinnier than you want them to be in the end, because they will rise again. Cut slits diagonally in the top with a sharp knife or a pair of scissors, about 1/4 inch deep. Place loaves on a cookie sheet a ways apart from each other, and cover with damp kitchen towel.
Let rise to about half-again their size.

Heat oven to 350 F. Bake bread until slightly golden, and when you tap on the crust it sounds hollow. Pull bread out, slather with butter, and eat it all with a big glass of milk. Now.


 Give us this day our daily bread, because with warm fresh bread in our tummies it is so much easier to forgive those who trespass against us.