Showing posts with label summer. Show all posts

22.7.13

Watermelon Limeade

No comments:

 I had leftover watermelon.


It is hot outside and cold drinks are wonderful things.


Hence, watermelon limeade.

In other, totally unrelated news:
My 8-month-old isn't so big on limes.


Watermelon Limeade (print recipe)
 8 c cubed watermelon
1 c water
juice of 6 key limes
1/2 c sugar

Blend all ingredients together until smooth. Chill and serve.


15.7.13

Watermelon-Strawberry Koldskaal

No comments:


Sometime back, I found a recipe on one of the blogs I was following for "koldskaal."
I was intrigued. Evidently, this is a traditional Danish dish that usually is made of buttermilk and other ingredients, and is eaten a kind of cold sweet soup during the summer.

Today was hot, and I decided to try my hand at making my own version of koldskaal from what I had in the fridge.
It was very simple: Watermelon. Milk. Yogurt. Strawberries. Dates. Egg.


It was amazing! It was light and frothy and sweet (without sugar!) and very filling. One bowl was plenty for me. I will definitely be making this again.

The inclusion of a raw egg might be a deal-breaker for some, but I figured... I eat raw cookie dough like there's no tomorrow, and that has raw egg in it... why not? It actually made this soup really frothy and creamy, and probably helped to make it so filling. But hey, if it's a deal-breaker for you, just leave it out. I won't tell.


Watermelon-Strawberry Koldskaal (print recipe)
1 thick slice watermelon
2 c strawberries
1 c milk
1 c plain unsweetened yogurt (I used greek yogurt)
1 egg
5 pitted dates

Blend together all ingredients on high until smooth and frothy. Chill, and serve. Makes two largish bowls.

2.7.13

Chicken and Peach Teriyaki Skewers

No comments:


I have two confessions to make.
One: I like low prices.
Two: I love salty-sweet foods.
Like chocolate-covered pretzels.
Or that salted caramel mocha that Starbucks used to serve.
Or salt on my watermelon. Or peach. Or nectarine. Or any other sweet fruit.

So, when peaches were on sale at my grocery store, I got a whole bunch. However, these cheap peaches were also very hard and not ripe, altogether lacking in the qualities that make peaches good for snacking on, in my opinion. So, they were the perfect peaches to experiment with the savory applications of peaches.

Enter: these teriyaki skewers. The sweeter flavors of peaches and honey and ginger combine quite nicely with the salty-savory of chicken and soy sauce. In my humble opinion.


I marinated a pound of chicken in homemade honey-teriyaki sauce for about half an hour. I would recommend marinating them longer, but I was hungry. And I'm an impatient person. Who doesn't plan ahead. So they only marinated half an hour.

Then I sliced up three peaches and tossed them with sesame oil and balsamic vinegar.


I threaded the skewers, alternating chicken and peaches, and then "grilled" them in an iron skillet. I have found that an iron skillet on my stove makes a decent substitute for a grill. But if you have a grill, hey, go outside and grill them!


They were a great summer meal, and came together pretty quickly.
Or at least, they would have if I had not been taking pictures the whole way through.
That's how a lot of my cooking goes, though.
Oh well.


Chicken-Peach Teriyaki Skewers (print recipe)

1 pound boneless chicken

1/4 c soy sauce
1/2 tsp worcestershire sauce
1tsp fresh pounded ginger
2 Tbs honey

3 peaches
1Tbs sesame oil
1Tbs balsamic vinegar

Mix soy sauce, worcestershire sauce, ginger, and honey in bowl and marinate chicken for at least half an hour.
Slice peaches into 8ths and toss in sesame oil and vinegar.
Thread skewers, alternating chicken and peaches.
Grill until chicken is done (about 10-20 minutes).

27.6.13

Kombucha

No comments:

Have you heard of kombucha?
Well... have you heard of kefir? How about yogurt?
If neither of the others, at least you have most likely heard of the last one. =]
Probiotics is what makes each of these things so "healthy."
As I mentioned in my post on whole foods, we in our modern society have become obsessed with making bacteria go away. And, when we are talking about harmful bacteria, this is indeed a good thing. However, not all bacteria is harmful. Actually, our body really needs bacteria in order to live. Things containing this beneficial bacteria that help our body are called "probiotics." Pro, meaning "for" or "good"; biotic referring to bacteria.

Most societies have some form of probiotic food in their traditional diet. Often these foods are valued because they do not go bad as easily as their non-fermented cousins. Think of yogurt (vs milk), cultured buttermilk, sourdough starter, ginger beer, etc. Even traditional ketchup was a probiotic culture! (Store-bought bottled ketchup is not, however).

Kombucha is one of these traditional probiotic things. Evidently it originated in Asia (northern area of China, I believe), and it is a fermented tea. I discovered it recently as I was blog-surfing and became curious. I love yogurt... would I like kombucha?


Further investigation revealed that a friend of mine from church makes her own kombucha, and I got a starter from her. I also bought a bottle of kombucha at the grocery store, just to have something to compare my homemade against. I'm going to be honest, though: the first sip I took was not the best experience of my life. It had a strong, vinegary flavor. My first thought was "apple cider vinegar"! My husband also did not particularly love it. However, I determined to make at least one batch and drink it and see if it improved with time.

I am now making my third batch of kombucha, and my impression of it has indeed improved. First of all, my homemade kombucha is 
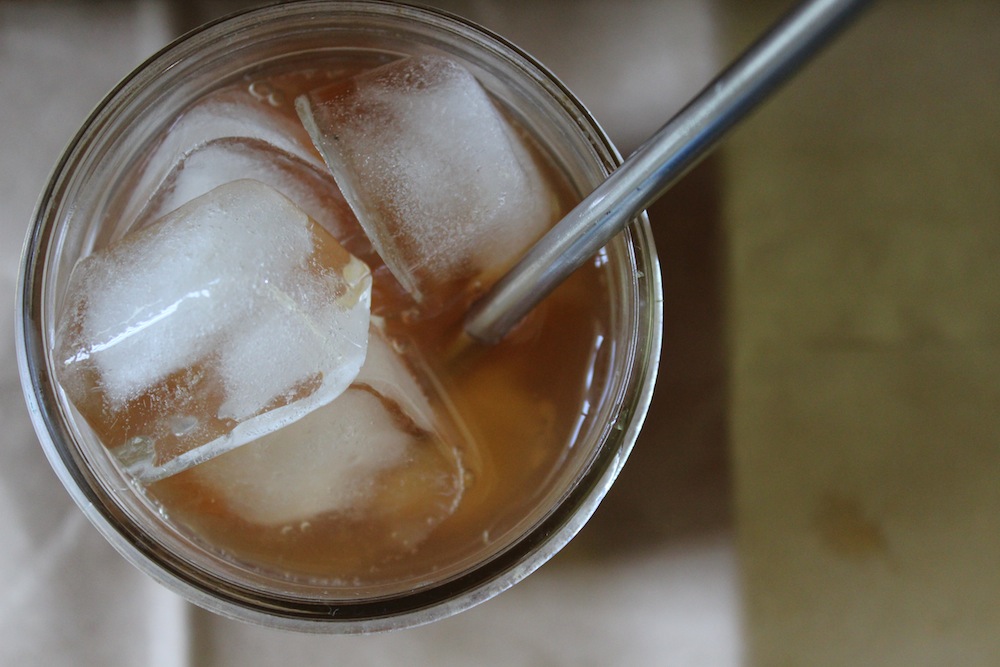
nowhere near as strong as the store-bought that I tried. It is a much milder, slightly tart, fizzy, refreshing drink. It still does carry a slightly vinegary flavor, but it is actually pretty good... kind of like lemonade, almost. But different.

At this point I will say, I might not have been particularly happy with it if I had gone out and bought a $15 starter culture or if it was very hard to make, but since I got my starter for free, and it takes very little work to make, this "healthy," probiotic tea is going to stick around for me. The taste grows on you. At this point, even my husband drinks it willingly.


I will also say that drinking kombucha has helped me to kick my over-the-top caffeine habit. I was drinking 4-5 cups of coffee a day, since my 7-month-old was sleeping horribly, and I'm sure my excessive caffeine intake was not helping his sleep issues. Since replacing my mid-day pick-me-up with a half-glass of kombucha, I was able to cut back to one small cup of coffee a day within a few days, without any caffeine headaches or noticeable energy loss. My son has also started to sleep much better... I don't know if the caffeine affected him or if it was one of the myriad of other things I have tried to get him to sleep better, but I do know that drinking less caffeine is probably much better for me.


Here is the blog post I used to learn to make kombucha: http://www.thekitchn.com/how-to-make-kombucha-tea-at-home-173858

Maybe you should try it, too! If you are near me (Oklahoma City) and want to try it, let me know and I'd be happy to share my starter!


13.6.13

Breakfast Fruit

No comments:


Fruit salad is a wonderful thing.

Especially when it is a super simple, healthy, fresh breakfast!
Not much work to this one.
Chop fruit.
Toss together.
Add some honey (or agave nectar, to keep it vegan).
Shovel into mouth with fork.

10.6.13

Simple Couscous Tabouleh

No comments:

Last spring I planted a bunch of different herbs in my garden. And then the super dry super hot summer teamed up with my extreme lack of plant growing ability and killed them all.  Except the parsley. The parsley not only survived, it thrived. It grew huge. It had no water for weeks and baked in the sun, yet it continued to grow. The puppy laid all over it and smooshed it into the ground and it continued to grow. The only problem was... what do you do with parsley??? I didn't know why I had planted it in the first place. I mean, you put parsley on plates in restaurants for a "garnish." Too bad that last summer I did not know tabouleh existed, or I would have used up ALL the parsley. And probably killed it. Oh well. 

Now that I know tabouleh exists, I love it! It is such a different sort of salad, full of summery flavor. It has a cool, herb-full flavor that goes perfectly with thick slices of multi-grain toast or whole wheat bread.

For my tabouleh, I started by juicing three lemons. 


I mixed the lemon juice with olive oil, pepper, and water, then added the couscous and cooked it in the microwave until the couscous was fluffy. If you did not know, couscous is a little pasta-type thing... kind of like a cross between a grain and a tiny pasta. It's good.


I then chopped up half of a cucumber into little pieces. I used half a cucumber because that is all I had. You can use a whole one if you like.


Then I chopped up a bunch of parsley.


I then tossed it all together with some balsamic vinegar, and chilled it. That's it! There are many recipes for tabouleh which have all sorts of things in them, from tomatoes to mint to bulgur wheat, but I like to keep mine to a minimum. Tabouleh is a delicious, simple summer lunch. Although my husband will say it's more of a side dish. He is a little leery of the "salad for lunch" idea.


Simple Couscous Tabouleh (printable recipe)
3 lemons, juiced (about 1/2 c lemon juice)
1/2 c olive oil
1/2 c water
1 tsp pepper
1 & 1/2 c couscous
1/2 cucumber, chopped (or a whole cucumber. your choice.)
1 bunch parsley, chopped (about 3-4 cups)
1/4 c balsamic vinegar

Whisk together lemon juice, olive oil, water, and pepper. Add couscous, and cook-- 3 min in microwave, then let stand until couscous is fluffy.
Toss couscous, cucumber, parsley, and vinegar in a large bowl.
Chill until cool (about an hour).
 

6.6.13

Strawberry- Grapefruit Breakfast Crumble

No comments:

When I was growing up, my mom used to make baked grapefruit for breakfast. She would halve the grapefruit, sprinkle the halves with brown sugar, and bake them until the brown sugar was crusty, the grapefruit was warm and sweet and juicy, and it was DELICIOUS. I make baked grapefruit for breakfast fairly often. The burned fingers and juice EVERYWHERE is totally worth the yumminess. But this Sunday, I just wasn't in the mood for wrestling with a hot grapefruit for my breakfast. So I decided to do something a little different.


I searched my fridge and came up with strawberries and grapefruits. I searched my counter-top and came up with multi-grain granola. And I decided I could make something work here. The result was wonderful! Not very sweet at all (since it has no sugar in it, just a bit of honey), the warm fruit gave this a tart-sweetness that was very refreshing and lovely for a summer Sunday morning breakfast. My husband poured cream over his... and I did too, on my second helping, because it looked really good.


That does kind of negate the healthy factor, but oh is it good! Besides, cream is not refined sugar... perhaps it does have fat and calories, but it is at least not super-processed! =D

 I sliced my strawberries and grapefruit into fairly large chunks. (I sliced those grapefruit slices into quarters after the picture)


I tossed them with some spices (cinnamon, cloves, and nutmeg) and a little flour and honey.


I spread them in a pan, and topped them with butter and granola.
And then I baked them for just long enough to melt the butter and soften the fruit (about 15 minutes).
Super easy, super yummy breakfast! So good with cream, or if you want to be a little healthier, yogurt.


Strawberry-Grapefruit Breakfast Crumble (printable recipe)

1/2 lb strawberries, thickly sliced
1 grapefruit, peeled and cut into chunks
1/2 tsp cinnamon
1 pinch cloves
1/2 tsp nutmeg
1Tb honey
2 Tb whole wheat flour (or regular flour)
3Tb butter
1c multi-grain granola (or any other granola, or mix of oats, nuts, seeds, etc)

Preheat oven to 400F (205C).
Toss fruit with spices, honey, and flour.
Cut butter up into small pieces and mix with granola, until mixture is crumbly.
Spread fruit out in pie pan (or small casserole dish).
Spread granola mixture over top of the fruit.
Bake for 15-20 minutes or until butter is melted and fruit is soft.
Serve with cream or yogurt for extra yum.

3.6.13

Lentil Sprout Spring Rolls

No comments:
Recently I found this blog post on a blog I follow, about sprouting seeds in a jar in your kitchen. I have sprouted two batches of lentil sprouts since then... brilliant! From about 3 Tb of lentils (which I bought at Sprouts on 63rd and May), I get an entire jar of sprouts within a few days. They are delicious, and besides how cool is it to grow your own sprouts?! The directions on that blog work like a charm.


My favorite thing to do with lentil sprouts is make them into these raw spring rolls. The lentils have a peppery, fresh flavor and a lovely crunch that works very well for spring rolls. I have put several different things in raw spring rolls -- whatever I have on hand. I have used spinach, apples, carrots, rice noodles, chicken, avacado, pork, green onions. Today's spring rolls had lentil sprouts, green onions, cucumber, green bell pepper (capsicum), and soy sauce soaked peanuts.


Spring rolls do take some time to assemble, but once you get into the rhythm it's really not that bad. And the payoff is delicious! I cut all of my vegetable into thin strips before beginning, and laid them all out on my counter beside the empty spot I was going to use to assemble the rolls. I also put the peanuts to soak in a bowl with a dash of soy sauce, a dash of ground ginger, and a spoon of sugar.


For these I use rice spring roll wrappers, which I get at my local Chinese grocery store. They are this brand. The wrappers have to be soaked in warm water for a few seconds to soften them, so I use a pie plate filled with warm water set on the counter beside my veggies. I put a wrapper in the water until it is pliable, then I pull it out and set it on the counter, and immediately put the next wrapper in the water to soak while I assemble the current spring roll. It is just about the right amount of time, usually.

To assemble, I spread the spring roll wrapper out on the counter top.


I then put a little of each of the things I'm using in the middle, near the bottom of the wrapper. Here are green onions, cucumbers, green bell pepper, a few peanuts, and a little bit of lentil sprouts.


Then, bring the bottom of the wrapper up over the pile of filling, and tuck it in around the top of them. Tuck rather tightly.


Fold the sides in.

And roll up tightly.


The wrapping process becomes much easier as you go, and with practice you figure out exactly how much filling to put in, and how tightly to wrap them so they don't fall apart and you don't tear holes in your wrapper. I serve my spring rolls with sweet chili sauce. Little bites of spring!