Showing posts with label breakfast. Show all posts

13.12.13

Tropical Muesli

No comments:


I am a firm believer in local food. I think that most of the time, the best foods to sustain our bodies in a given environment are those that grow in that same environment. Native societies that eat a "native" diet are often far healthier than those who eat a "Western" diet. I try, therefore, to make a large part of our diet that food which grows in the local environment.

We recently moved to the tropics, and therefore our diet has changed quite a bit from what we ate in the mountains of Colorado. This is partly because of my beliefs about eating local food, and partly because local food is usually cheaper! Therefore, we have been eating far more fruits and vegetables than we did in the states. It is fun, because these tropical fruits are a treat for us -- they are so expensive in the States, and so very cheap here! We currently have a large stalk of bananas hanging on our porch, from a tree in my parents' yard nearby. 

As you can see from the couple of other "granola" recipes on my blog, I really like granola, or muesli. I'm not perfectly sure what the difference between the two is-- I think that granola tends to be more "clumpy" and eaten as a trail mix, and muesli tends to be more "crumbly" and eaten with milk like cereal. But I'm not sure. Since I love granola so much, it only seemed right that I would figure out how to make a version here with a more "tropical" feel.  What I grew up calling "muesli" was more tropical in nature (since I lived in Fiji), and so that is what it felt like I should call this particular recipe. 

I know some of the people who read my blog do not live in the same environment that I do, but perhaps you can get ideas on how to use things that grow in your area. If nothing else, try making this tropical muesli on a day when you just would much rather be on some South Pacific island than wherever you are, and you might just feel a little closer to the warm tropical air! 

Tropical Muesli 

1 bag/ 750g rolled oats
1/2 c vegetable oil
1c coconut oil
1 c sugar
2 c shaved coconut
1 c dried bananas (optional)
1 c dried pineapple (optional)

Mix oils and sugar together in a bowl, then pour mixture over oats. Stir until oats are coated. 
Toast coconut lightly on stove (very lightly, it will cook more later), and stir into oats. 
Spread oat mixture out on cookie sheets about 1/2 inch thick, and bake at about 350F for about 30 minutes or until coconut is golden brown (oats will not darken much). 
Mix in dried fruit. Also really good with fresh fruit piled liberally on top. 
Serve with yoghurt or milk or just eat by the handful. =]


15.7.13

Watermelon-Strawberry Koldskaal

No comments:


Sometime back, I found a recipe on one of the blogs I was following for "koldskaal."
I was intrigued. Evidently, this is a traditional Danish dish that usually is made of buttermilk and other ingredients, and is eaten a kind of cold sweet soup during the summer.

Today was hot, and I decided to try my hand at making my own version of koldskaal from what I had in the fridge.
It was very simple: Watermelon. Milk. Yogurt. Strawberries. Dates. Egg.


It was amazing! It was light and frothy and sweet (without sugar!) and very filling. One bowl was plenty for me. I will definitely be making this again.

The inclusion of a raw egg might be a deal-breaker for some, but I figured... I eat raw cookie dough like there's no tomorrow, and that has raw egg in it... why not? It actually made this soup really frothy and creamy, and probably helped to make it so filling. But hey, if it's a deal-breaker for you, just leave it out. I won't tell.


Watermelon-Strawberry Koldskaal (print recipe)
1 thick slice watermelon
2 c strawberries
1 c milk
1 c plain unsweetened yogurt (I used greek yogurt)
1 egg
5 pitted dates

Blend together all ingredients on high until smooth and frothy. Chill, and serve. Makes two largish bowls.

17.6.13

Aunt Martha's Cinnamon Rolls

No comments:
In my husband's family, these cinnamon rolls are a traditional treat. He and his brother used to request them for their birthdays. I got the recipe from his mom when I was setting up my kitchen. Evidently Aunt Martha is my husband's great-aunt... who makes good cinnamon rolls!


Cinnamon and sugar are generously spread on a lightly sweet dough.


Rolled up, cut into fat little cinnamon rolls.


Placed into what you may have realized by now is my favorite purple pan.

Risen, baked, and eaten with much enjoyment!


Aunt Martha's Cinnamon Rolls (printable recipe)
1package yeast (or 2 and 1/4 tsp)
1/4 c lukewarm water1 c milk
2Tbs butter
1/4c sugar
1tsp salt
1 egg
4c flour
1/4c sugar
2Tbs cinnamon

Dissolve yeast in lukewarm water.
Scald milk. Add butter, sugar, and salt. Cool to lukewarm.
Add egg, yeast, and 1 and 1/2 c flour to milk. Stir well. (or, if you have a mixer, beat for 2min on #2 speed)
Add 1/2c flour. Stir well again.  (or beat another 2min)
Stir in remaining flour by hand. Place dough in clean, greased bowl.
Let rise to double. (about an hour)
Knead, and roll out with rolling pin to 18" square.
Melt butter, spread on dough.
Sprinkle with sugar and cinnamon.
Roll jelly roll fashion, cut into cinnamon rolls.
Place in well-greased (and floured) pan.
Let rise to double (about an hour).
Bake at 450F  (230C) until dark golden brown -- about 15-20 minutes.


13.6.13

Breakfast Fruit

No comments:


Fruit salad is a wonderful thing.

Especially when it is a super simple, healthy, fresh breakfast!
Not much work to this one.
Chop fruit.
Toss together.
Add some honey (or agave nectar, to keep it vegan).
Shovel into mouth with fork.

6.6.13

Strawberry- Grapefruit Breakfast Crumble

No comments:

When I was growing up, my mom used to make baked grapefruit for breakfast. She would halve the grapefruit, sprinkle the halves with brown sugar, and bake them until the brown sugar was crusty, the grapefruit was warm and sweet and juicy, and it was DELICIOUS. I make baked grapefruit for breakfast fairly often. The burned fingers and juice EVERYWHERE is totally worth the yumminess. But this Sunday, I just wasn't in the mood for wrestling with a hot grapefruit for my breakfast. So I decided to do something a little different.


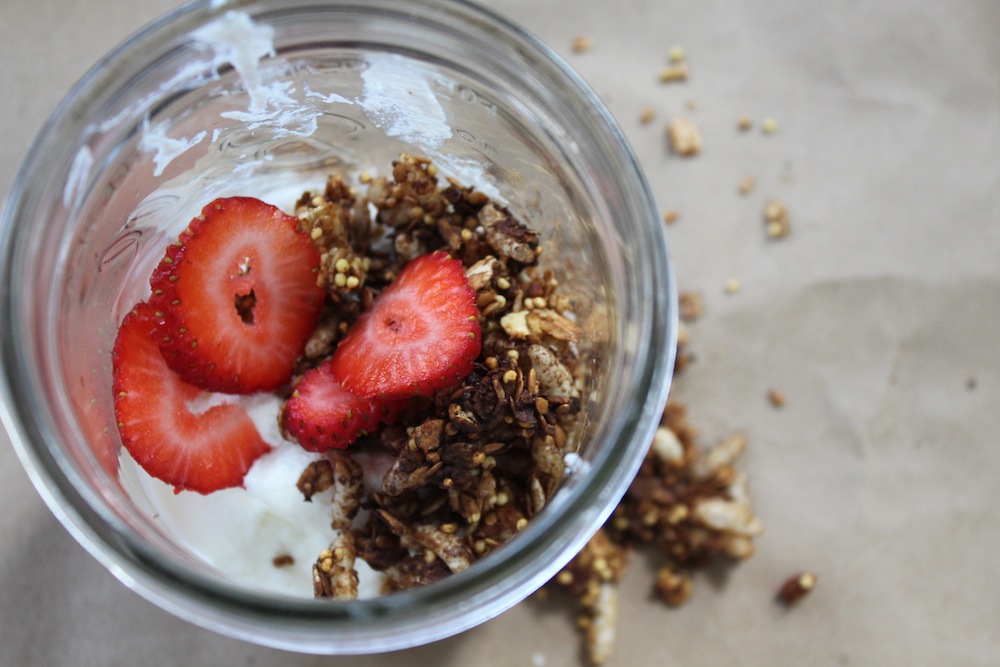
I searched my fridge and came up with strawberries and grapefruits. I searched my counter-top and came up with multi-grain granola. And I decided I could make something work here. The result was wonderful! Not very sweet at all (since it has no sugar in it, just a bit of honey), the warm fruit gave this a tart-sweetness that was very refreshing and lovely for a summer Sunday morning breakfast. My husband poured cream over his... and I did too, on my second helping, because it looked really good.


That does kind of negate the healthy factor, but oh is it good! Besides, cream is not refined sugar... perhaps it does have fat and calories, but it is at least not super-processed! =D

 I sliced my strawberries and grapefruit into fairly large chunks. (I sliced those grapefruit slices into quarters after the picture)


I tossed them with some spices (cinnamon, cloves, and nutmeg) and a little flour and honey.


I spread them in a pan, and topped them with butter and granola.
And then I baked them for just long enough to melt the butter and soften the fruit (about 15 minutes).
Super easy, super yummy breakfast! So good with cream, or if you want to be a little healthier, yogurt.


Strawberry-Grapefruit Breakfast Crumble (printable recipe)

1/2 lb strawberries, thickly sliced
1 grapefruit, peeled and cut into chunks
1/2 tsp cinnamon
1 pinch cloves
1/2 tsp nutmeg
1Tb honey
2 Tb whole wheat flour (or regular flour)
3Tb butter
1c multi-grain granola (or any other granola, or mix of oats, nuts, seeds, etc)

Preheat oven to 400F (205C).
Toss fruit with spices, honey, and flour.
Cut butter up into small pieces and mix with granola, until mixture is crumbly.
Spread fruit out in pie pan (or small casserole dish).
Spread granola mixture over top of the fruit.
Bake for 15-20 minutes or until butter is melted and fruit is soft.
Serve with cream or yogurt for extra yum.

30.5.13

Yogurt Revisted, and Greek Yogurt

No comments:

Since writing my yogurt post  quite a while back, I have continued to try to find easier ways to make yogurt. Not that it was that hard to begin with... I'm just lazy. And I really like yogurt. So I try to find easier ways to make it. Also, I have developed a love for greek yogurt... and good grief that stuff is expensive! I finally found some at Sprouts for $3 a quart, but still. Greek yogurt is an expensive habit.

So of course I set out to find a way to make it at home, cheaper. If you care what the costs come up to, read on. If not, skip this next paragraph.
I can buy milk for $2.60 a gallon at Crest, and I use about 1 quart per batch of yogurt. (I don't measure it exactly. I never measure anything exactly. I am so sorry. But that is probably not going to change.) So each 1 quart batch of homemade yogurt is about $.65. Not bad when you consider that a quart of store-bought plain yogurt generally runs around $1.50, if you're lucky! But even greater things are in store for my money-saving yogurt venture. When I strain my yogurt and make it into greek yogurt, I end up with about half as much greek yogurt as I had plain yogurt (1 pint). So, I can make 1 pint of greek yogurt for $.65, when the same amount of store-bought greek yogurt costs $1.50 at the cheapest place I found it! Plus, I don't just have greek yogurt, I also have 1 pint of whey that I strain off of it, which I use in place of buttermilk. Win, win, and cheap win.

So, now as to how I actually make it.
Because I am lazy, I don't like standing over a hot stove stirring my heating milk to make sure it doesn't burn... so I heat it in the microwave. The reason to heat up the milk to very hot is to kill any existing bacteria that might be in it, so that our introduced bacteria can thrive with no competition. So I stick my bowl of a quart of milk in the microwave for about 6 minutes, or until it is steaming.

Then, I let it cool down, so that when I introduce the new bacteria they don't get killed immediately. I let my bowl of milk sit with the microwave door open for about 40 minutes, stirring it occasionally. You want to be able to hold your pinky finger in the milk for ten seconds without being burned. But you don't really want it to get any colder than that, because it has to be warm enough for the bacteria to grow. If you are using a thermometer, you want it to stay in the 90-120 F range. (32-48C)

I then stir about 3 Tb of yogurt into the milk. This can be store bought yogurt (live culture), or the last bit of your last batch of homemade yogurt. I used the last of some greek yogurt I bought at Sprouts for this batch. I then put a lid on my bowl of milk, put it back in the microwave, and tucked a nice fluffy towel around it to keep it warm. My house was warm enough that this was all it needed to stay warm all night, but if you are worried about it cooling off, you could put a bottle of hot water in there with it. I did that over the winter. I have also put the yogurt bowl in a cooler with a towel and a couple of bottles of hot water. Whatever it takes to keep it warm, at about the same temperature it is now.

Then... leave it. The longer you leave it, the stronger it gets. I left my batch overnight, about 12 hours. (8pm to 8am). You can peek at your yogurt to see if it's where you want it. You want it to be about this consistency:


As you can see, it's still fairly runny, but it is more "yogurty" than "milky." (I'm all for the technical terms).

At this point, you can just stir this yogurt up and pop it in the fridge, and you have plain yogurt. But if you want greek yogurt, you have one more step. If you are going to make greek yogurt DO NOT STIR it. Instead, pour it into a strainer over a bowl. I use a yogurt strainer, but in the past I have used cheesecloth in a colander, or even a loose weave cloth napkin (serviette) in a colander. Place your straining yogurt in the fridge, and leave it until it is as thick as you desire. I strained this batch for 5 hours (until 1pm). This yielded a consistency pretty similar to store bought greek yogurt, and strained about half of the volume out as whey. If you leave it for longer, it turns into greek yogurt dip (or spread), and even longer gives you cream cheese! Of course, the volume continues to go down.


When it is like you want it, spoon the yogurt into a container for storage (I use a glass jar), and if you are keeping the whey (which I recommend), pour it into another jar. Stir the yogurt vigorously to break up any chunks and to give it a creamy consistency.

whey and yogurt
The whey can be used just like buttermilk (like in these biscuits). And there you have it! Yogurt!


Yum.


This recipe was shared on: Real food Wednesday, and Thank Your Body Thursday.

27.5.13

Multi-Grain Granola

No comments:


One of the best tricks to cooking cheap whole food is using what you can find on sale, or is usually a good price where you are. Granola, while it seems like an expensive thing to make, can actually be a great price if you use the things on hand. The other cool thing about granola is that it can take a lot of variation. It is basically just roasted grains with some kind of thing to stick them together (honey, syrup, oil, etc.).

We love granola because in literally 15 minutes, I can put together a big batch that will last us for a couple of weeks. It is filling, healthy, and easy to grab a handful of for a snack. It is wonderful with yogurt, good with milk, and great just by itself. We use granola instead of store-bought cold cereals, which have so much sugar and preservatives in them and are just plain expensive. 

This recipe is one I have developed from the things I found at my whole foods store and local grocery for reasonable prices. You can substitute in whatever grains/ seeds/ nuts you can find. Make it as complex or as simple as you like. Think of this as an example... use your imagination to make your own!

I'd like to list the prices for you so you can see what I make this for... but I had all the ingredients in my kitchen and honestly haven't a clue what they each cost at this point. It has been a couple weeks since that grocery run. I can tell you for those of you in Oklahoma City that I got the oats as "old fashioned oats" at Buy For Less in Bethany, I got the flax, millet, honey, and almonds at Sprouts (63rd and May), and I got the puffed rice and cinnamon at Spices of India (39th and Portland).

Pick your grains first. As I already said, I used oats, millet, flax, and puffed rice for my grains. You can use as few as one grain (probably oats), or as many as you like. Think rolled quinoa, buckwheat, rolled spelt, rolled amaranth, rolled wheat berries.


Then, pick nuts. Again, you can do as few or as many as you like. I used almonds, because they were on sale. You could use peanuts, pecans, cashews, walnuts, etc. Also, think about spices. I just used cinnamon, partly because it was cheap and partly to keep the flavor of the granola simple since I already had so many grains.


Finally, choose what you are going to use to hold the granola together, usually a sweet syrupy part (think honey, agave nectar, maple syrup, molasses, sorghum) and an oil part (such as vegetable oil, olive oil, coconut oil, or almond oil). The more "clumpy" you want it, the more sticky stuff you add. For mine today, I used honey and vegetable oil. At the amounts I used, it does form clumps but they fall apart fairly easily.


Mix all your ingredients together, and spread out on a cookie sheet. Cook at a high heat, I did 400F (200C) until granola is nice and toasted. It cooks really fast, keep a good eye on it. Mine cooked for about 15/20 minutes. Then take it out, and let it cool at least somewhat on the cookie sheet before scraping it off. Cooling it on the sheet allows it to dry out and clump together some. However, if you wait too long to scrape it up, you will end up with quite a job on your hands, as it will probably stick!

There you have it! Granola! What I did was make a few small batches until I figured out how I liked it -- what grains, how clumpy, how sweet, etc. I would recommend you do the same, until you figure out exactly what you like.

Here is exactly what I used for mine today: (warning: this granola is not very sweet at all. If you want it to be sweet, add more honey or some sugar or you could always eat it with sweet fruit or yogurt.)

Multi-grain Granola (print recipe)
4c rolled oats
3c puffed rice
1c flax seeds
1c millet
1c almonds, chopped
1/3c honey
1/4c vegetable oil
3Tb cinnamon

Preheat oven to 400F. Mix all ingredients in large bowl. Spread on cookie about 1/2 to 1 inch thick. Bake for 15-20 minutes, until golden brown. Let cool. Scrape off cookie sheet and place in sealed jar. Keeps for a long time. 


24.6.12

Dutch Babies (aka German Pancakes in a muffin tin)

No comments:

These are one of my favorite breakfast foods ever.
No, really, they really are.
Above French toast.
Above eggs.
Above bacon... well, that might be taking it a bit too far. There really isn't much above bacon.

But these little breakfast things are really good. I'm not completely sure how to describe them... if you have had yorkshire pudding, they are kind of like a sweet version of yorkshire pudding. But I don't know very many Americans who have had yorkshire pudding. They are kind of dense, eggy, salty, and sweet, very buttery, and delicious with fruit on top.What they actually are is Dutch or German pancakes, but made in muffin tins instead of a skillet, so they are little.  Just make them, and then you will know how good they are and I won't have to explain it!


I got this recipe, and adapted it a very little, from this blog.


Dutch Babies

6Tb melted butter
1 cup flour
1/3 cup sugar
1 tsp vanilla
1 tsp salt
1 cup milk
4 eggs

Preheat the oven to 375 degrees F. Then, mix together all your ingredients EXCEPT the butter... you can mix the dry ingredients and then add the wet ingredients if you want, or you can do it the other way around, or you can just dump all the ingredients in a bowl together and stir... I really don't care, it all works. The goal is to get it all mixed together, by whatever way makes you the most comfortable.

Add two tablespoons of the butter into the batter.
Now, take the rest of the butter (that is 4 tablespoons), and use it to grease a 12-muffin muffin tin. Use all the butter. there will be little pools of lovely warm golden butter on the bottom of every muffin tin. You want that. You want lots of butter. Butter is good.

Pour the batter into the muffin tins, but don't fill the tins too full. You want them to be about half  to three-quarters full, actually, with plenty of room to puff up to their full, delicious, puffy, butter glory.

Bake for 12-14 minutes, until they are all puffed up and the edges are golden. They will puff pretty high.


Pull them out of the oven, and let them cool a bit before pulling them out of the muffin tin and serving them with fruit on top... or jelly... or lemon juice and sugar... or berries... or whatsoever you desire to serve with these little pillows of deliciousness.


The centers will fall down, leaving the edges puffy, giving you a lovely little cup in which to hold the topping of your choosing.

You can make a large portion of the batter and then keep it in the fridge and cook only as many dutch babies as you want at the time... the batter keeps well in the fridge for at least a week. I'm not sure if it lasts longer... I usually use it all up within a week, and if I don't use it up in that time it's usually because I've forgotten about it, in which case I will continue to forget about it until it is far too late.

Happy Dutch Baby eating!


1.10.11

Chai Spice Granola

No comments:

This is the confusing time of year. The time of year where one day feels like fall, bordering on winter, and then the next day feels like Oklahoma didn't get the memo that it doesn't lie directly on the equator. You never know if the next day you need to wear a sundress or a scarf. It's weird. Weird Oklahoma.

On a recent fall-ish sort of day, I decided to make granola. But you know me... I get bored easily. Boring old same-same granola didn't sound like any fun to me. So I thought I'd try something different. The result was delightful. Crunchy, crispy, clumpy granola with a spicy bite to it. Sooo good with homemade yoghurt. Just ask my mom. She tried some.

It literally tastes like chai tea.... in granola form.
Yeah.
Awesome.
So awesome you want to make yourself right now, right?
Ok, ok, stop begging. I'll give you the recipe.


Keep in mind that this is granola, and therefore, things don't have to be exactly like in my recipe. If you want walnuts, then add walnuts. If you don't want/have sesame seeds, don't add them. Anything that is crunchy and that you want in your granola, then by all means, add it in.  Oats are kind of important though. Don't leave out the oats.


By this time, the house smells really good. Really, really good. By the time the granola is finally done, I want to eat it all
all
all.


Chai Granola (print recipe)

Ingredients:
4c oats
1c almonds
1/4 c sesame seeds
1/2 c brown sugar
1/4 tsp salt
2 tsp cinnamon
1/2 tsp cloves
1/2 tsp ginger
1/2 tsp nutmeg
1/8 tsp ground black pepper

1/2 c vegetable oil
4 Tbsp sesame oil (or just more vegetable oil)
1/4 c honey
2 Tbs sugar
2 tsp vanilla

1/2c raisins

Mix the ingredients from oats to pepper in a large mixing bowl. Remember that you are in charge here, if you want more or less of anything, go for it. I like extra ginger and pepper, it makes the granola more spicy. I also have a real hard time not adding more cinnamon and nutmeg. I like spiciness in my granola. Pretty much, I just think of the oats as the things which hold the yummy spices. If I could make granola just out of spices, I probably would.

In a small sauce pan, mix the oils, honey, and sugar. Bring to a boil and simmer for a little while, whisking constantly, until it is all frothy. It will make this bubbly froth stuff. That's when you add the vanilla. Then pour the frothy stuff all over the dry mix, and stir the two together really well. Mix, mix, mix, until all the oats have that yummy sweet honey stuff on them.

Spread the granola out on a cookie sheet, no more than 1/4- 1/2 inch thick. Bake this in the oven at 300F for about 15 minutes, or until it looks golden brown.

Take out the cookie sheet and set it out to cool. Do not mix granola up at this point unless you do not want clumpy granola. But I like clumpy granola. Then, when it is dry (it will be hard), scrape it up off the cookie sheet with a spatula, break it into the size of clumps you want, and add the raisins. The reason I add the raisins now is because I have had too many bad experiences with the raising burning into little charcoal balls in the oven long before the rest of the granola is crispy.

Pour all of your granola into a cute jar. Seriously, if you are going to cook you really need a bunch of cute jars. It's important. Go buy them at thrift stores for fifty cents apiece. Or ask your mother-in-law to get them at garage sales for you. That works for me.

24.8.11

Yoghurt!

No comments:

I recently found out that evidently the word "yoghurt" is not spelled the same in british and american english. Yet another example of how impeded my ability to communicate with my peers is. Yeah, you can stop talking about how much I communicate anyway. I know I talk a lot. I know.

But honestly this post is not about my tendency to not stop the flow of wisdom that proceeds forth out of my mouth, but rather about my attempts to make yoghurt. You see, it recently occurred to me that while yoghurt costs over $3 a quart, milk only costs about $3 a gallon. And I eat a lot of yoghurt. So, I thought, I could save a LOT of money by just making my own yoghurt! Well, actually, I probably would not actually save any money because I would be so much more likely to actually eat the yoghurt that I made that I would eat enough more of it to negate the fact that it cost less. Whatever. The point is, less money, more creamy tart yumminess. So I set out to find a simple way to make homemade yoghurt.

That search, while it may sound easy, is not. It is hard. Yoghurt is a thing which is shrouded in mystery, difficulty, and precise temperatures for prolonged periods of time. I do not have a) a yoghurt maker, b) a double boiler, c) a candy thermometer, or d) a heating pad thingy. It would seem that my yoghurt making ambitions were doomed. However, after much perseverance (I really like yoghurt) I finally happened upon a blog which told you how to tell when the milk and the yoghurt are the right temperature without a thermometer! With a little tweaking, the recipe worked great! My yoghurt is lovely! It is wonderful with fruit and granola in it for breakfast, and I feel oh-so-healthy as I eat it. And yes, I do eat about 4 times as much yoghurt now, which means I spend about the same amount of money on it as before, but hey, I get more of it now! =D

Ok, I'll stop talking and just show you how I make it.

You will need:
a pan
a whisk
sealable containers for your yoghurt
a blanket or several towels

milk (the amount of yoghurt you want to make, that's how much milk you need)
1/4 cup yoghurt (for your first batch. after the first batch, you can use the leftover yoghurt from your last batch)

Step 1: heat the milk in the pan, stirring lots with a whisk. Like, stir it a lot. Obsessively. Do not go do your laundry. Stay right there and stir that milk. Sometimes I wash dishes in between stirring, but mostly do stirring. Or it will burn. Yuck. Heat it until it begins to froth like that stuff you put on top of cappuccinos, and steam is coming off of it a lot.


Step 2: Now transfer the pot with the milk in it to a sink of cold water. I know, it seems weird, heat up the milk, cool the milk, but trust me it works. Promise. Continue stirring the milk, and cooling it off until you can keep your pinky finger in the milk for 10 seconds without it burning. Why? Because that's the right temperature. Just is.


Step 3: Take the pot out of the cold water and stir the yoghurt into the milk.


Step 4: Pour this warm milk-yoghurt stuff into your yoghurt containers. Make sure your containers aren't cold when you do this, they should be warm. You don't want to cool off the milky yoghurty stuff.

Step 5: Snugly wrap up your yoghurt containers in the blanket or towels and put them somewhere they will stay warm. It being Oklahoma in the summertime here, "somewhere they will stay warm" is right there on my kitchen counter. I mean, it's 105 degrees, they aren't going to cool off. You might need to find a warmer place, like near a heater.


Step 6: leave them there for about 8 hours, maybe a bit more depending on how it is doing. If it is getting thickish (it will still be pretty runny) and tart, then they are doing good.

Step 7: When they are done, take your containers out of the blanket and stir the yoghurt vigorously. You are trying to stop the bacteria activity, so it doesn't keep yoghurtifying. Then, put the containers in the fridge overnight (about 8 hours again). The yoghurt will thicken some in the fridge.

Step 8: Eat!