Showing posts with label bake. Show all posts

17.6.13

Aunt Martha's Cinnamon Rolls

No comments:
In my husband's family, these cinnamon rolls are a traditional treat. He and his brother used to request them for their birthdays. I got the recipe from his mom when I was setting up my kitchen. Evidently Aunt Martha is my husband's great-aunt... who makes good cinnamon rolls!


Cinnamon and sugar are generously spread on a lightly sweet dough.


Rolled up, cut into fat little cinnamon rolls.


Placed into what you may have realized by now is my favorite purple pan.

Risen, baked, and eaten with much enjoyment!


Aunt Martha's Cinnamon Rolls (printable recipe)
1package yeast (or 2 and 1/4 tsp)
1/4 c lukewarm water1 c milk
2Tbs butter
1/4c sugar
1tsp salt
1 egg
4c flour
1/4c sugar
2Tbs cinnamon

Dissolve yeast in lukewarm water.
Scald milk. Add butter, sugar, and salt. Cool to lukewarm.
Add egg, yeast, and 1 and 1/2 c flour to milk. Stir well. (or, if you have a mixer, beat for 2min on #2 speed)
Add 1/2c flour. Stir well again.  (or beat another 2min)
Stir in remaining flour by hand. Place dough in clean, greased bowl.
Let rise to double. (about an hour)
Knead, and roll out with rolling pin to 18" square.
Melt butter, spread on dough.
Sprinkle with sugar and cinnamon.
Roll jelly roll fashion, cut into cinnamon rolls.
Place in well-greased (and floured) pan.
Let rise to double (about an hour).
Bake at 450F  (230C) until dark golden brown -- about 15-20 minutes.


6.6.13

Strawberry- Grapefruit Breakfast Crumble

No comments:

When I was growing up, my mom used to make baked grapefruit for breakfast. She would halve the grapefruit, sprinkle the halves with brown sugar, and bake them until the brown sugar was crusty, the grapefruit was warm and sweet and juicy, and it was DELICIOUS. I make baked grapefruit for breakfast fairly often. The burned fingers and juice EVERYWHERE is totally worth the yumminess. But this Sunday, I just wasn't in the mood for wrestling with a hot grapefruit for my breakfast. So I decided to do something a little different.


I searched my fridge and came up with strawberries and grapefruits. I searched my counter-top and came up with multi-grain granola. And I decided I could make something work here. The result was wonderful! Not very sweet at all (since it has no sugar in it, just a bit of honey), the warm fruit gave this a tart-sweetness that was very refreshing and lovely for a summer Sunday morning breakfast. My husband poured cream over his... and I did too, on my second helping, because it looked really good.


That does kind of negate the healthy factor, but oh is it good! Besides, cream is not refined sugar... perhaps it does have fat and calories, but it is at least not super-processed! =D

 I sliced my strawberries and grapefruit into fairly large chunks. (I sliced those grapefruit slices into quarters after the picture)


I tossed them with some spices (cinnamon, cloves, and nutmeg) and a little flour and honey.


I spread them in a pan, and topped them with butter and granola.
And then I baked them for just long enough to melt the butter and soften the fruit (about 15 minutes).
Super easy, super yummy breakfast! So good with cream, or if you want to be a little healthier, yogurt.


Strawberry-Grapefruit Breakfast Crumble (printable recipe)

1/2 lb strawberries, thickly sliced
1 grapefruit, peeled and cut into chunks
1/2 tsp cinnamon
1 pinch cloves
1/2 tsp nutmeg
1Tb honey
2 Tb whole wheat flour (or regular flour)
3Tb butter
1c multi-grain granola (or any other granola, or mix of oats, nuts, seeds, etc)

Preheat oven to 400F (205C).
Toss fruit with spices, honey, and flour.
Cut butter up into small pieces and mix with granola, until mixture is crumbly.
Spread fruit out in pie pan (or small casserole dish).
Spread granola mixture over top of the fruit.
Bake for 15-20 minutes or until butter is melted and fruit is soft.
Serve with cream or yogurt for extra yum.

8.8.12

Spiced Orange Tart

No comments:

Oranges are really cheap at my grocery store right now. Now, I do like oranges, but I have some sort of mental block against just picking them up and eating them as a snack.

I'm not sure why... maybe it's because when I was little I chewed my fingernails and so I could never really peel oranges very well and they were a lot of work to eat for little me.

Maybe it is because one time when I was around 6 I ate an orange by slowly and messily dissecting it little juice-filled packet by packet.... on top of one of my favorite books... thereby accidentally banishing that book to sticky, orange-covered oblivion. Poor book. That must have traumatized me or something.

ANYWAY, for whatever reason, oranges always sound really good at the store, and they are cheap, so I buy them... and then they sit in my fridge for several months until they are sufficiently green and fuzzy to be sent to the compost pile. But not this time! This time I decided to take control of the destiny of the oranges in my fridge and make something of them. I adapted this recipe a bit for the custard insides: http://www.crumbblog.com/2012/03/pretty-in-pink-blood-orange-tart.html, and I adapted this recipe for the spice shortbread crust stuff: http://smittenkitchen.com/blog/2008/11/the-great-unshrinkable-sweet-tart-shell/

First off, the tart shell. See, the shell has to sit in the fridge and chill for a little while before you bake it, so it is a good thing to start off with.


Cinnamon and nutmeg in liberal helpings take this tart crust from pretty darn good to a spicy, wonderful thing that makes your kitchen smell like heaven.


Flour, icing sugar, butter, spices, and an egg combine together into crumbly goodness. The trick to this tart crust is first to cut in the butter until it is very coarse, then to add the egg and stir in the egg until the crust begins to clump together like the last picture above shows.

When it begins clumping like that, dump it out of the bowl onto your countertop and gently fold it over and over until it sticks together into a rough crust.
This will take a while, and you will be tempted to mash it together and knead, but you must resist the temptation because that will take away all the lovely flakes of butter in the crust. Gently press the crust into a square, then fold it in half (sort of roughly since it is all crumbs), press it together again, fold again, etc, until it is done.


Then take this rough crust, wrap it in saran wrap, and place it in the fridge for a while so that the moisture can work all the way through it and make it easier to work with.


Roll it out on plenty of flour, and put it into a tart or pie pan, then press it with your fingers until you like the shape.


Freeze this shell now, for about 20 minutes or until it is sort of firm. This will help it keep its shape while baking.

Meanwhile, lets begin to talk about the insides of this tart. Orange juice, lemon juice, spices, and eggs combine to make a lovely custard. I didn't have a lemon, so I used a lime instead. It worked.


Juice oranges until you are tired of juicing oranges, then juice a few more...


Aren't egg shells pretty?

You are going to cook the mixture until it turns into a custard. This is not hard, you just have to heat it up slowly and stir it constantly or it will curdle. I am a very impatient, forgetful person so mine usually curdles. I then just pretend that is how it was supposed to be, and no-one is the wiser. It doesn't affect the taste, just the looks... and if whoever you are feeding it to hasn't made custard before, perhaps you too can convince them that it is supposed to be a bit lumpy.

While your custard cools, you can pull your tart shell out of the freezer, poke it all over with a fork so that it doesn't bubble, and bake it.

Once it is baked, pour your custard into it.


Now, pop it back in the oven to bake the custard. I like to sprinkle some cinnamon and nutmeg over the top of it before baking it, because it is pretty, hides my lumpy custard, and tastes good.

And then you eat!


Spiced Orange Tart Recipe

Crust ingredients:
1 and 1/2 cups flour
1/2 cup icing sugar
1/4 tsp salt
1 stick plus 1 Tbs cold butter
lots of cinnamon and nutmeg... like, probably 2 Tbs of each. At least.
1 large egg. Or two or three eggs the size of the eggs I use, which are laid by little farm chickens in my mother-in-law's barn.

Mix together flour, sugar, salt, and spices. Cut butter into cubes, then cut it into the flour mixture until it is in large crumbs. Beat the egg, then mix it in. Keep stirring until the mixture begins to clump, then turn out on counter and gently knead until it clings together. Wrap in saran wrap and place in fridge for 10 to 20 minutes, or up to a day.

When ready, roll out crust and press into pan, then freeze for about 20 minutes or until slightly firm. Poke all over with fork, cover with aluminum foil, then bake at 400 degrees F for 20-25 minutes. Remove foil and bake for another 10 minutes to brown crust.

Custard ingredients:
2 tsp orange zest
3/4 cup fresh orange juice
2Tbs lemon or lime juice
3/4 cup sugar
3 whole eggs
1 egg yolk
1/4 cup butter, cut into cubes
1 Tbsp each of cinnamon and nutmeg

Whisk all together in medium saucepan and heat slowly while stirring constantly. Heat until mixture thickens enough to coat back of spoon... a very runny custard.

Pour custard into crust and bake at 350 degrees F for 25- 30 minutes until custard is cooked. This means that it will be a bit bubbled at the edges but the middle will still wobble some.

Chill in the fridge until ready to eat.

Enjoy!


12.7.12

Herb Bread from yeast starter

No comments:


I've never been much of a gardener. When we were growing up, my brother used to forbid me to even look at his tomato plants, because he believed that if I looked at them they would die. It probably was not an entirely unfounded belief.

I think that my stunning lack of success as a gardener is closely tied to my scatterbrained personality. I just... forget that I have plants to take care of. I water them and weed them and help them tenderly along and then the next time I remember they exist it has been two weeks and they are dried, shriveled little shrubs of themselves, overtaken by the more hardy weed-plants that don't need my care or protection.

I do have a solution to this problem. I learn to like the weeds. I pretend that the four-o-clocks that have taken over my front flower bed are gorgeous, and what I wanted there all along. Stickers? Builds character.

But I haven't entirely given up on the idea of my own garden filled with real plants that I actually planned to be there. I keep trying. And I'm getting better. For example, my herb garden this year was not entirely a bust. Granted, the basil is kind of... sad. And the rosemary insists that life in my garden is just not worth living. But the parsley is doing GREAT. ... uh, what do you do with parsley? Lots and lots of parsley?

Anyway, it came to my attention the other day that I actually had quite a few herbs in my garden, and I decided that the time had come to put them to work in my kitchen. Why else grow herbs? Exactly. So I made this delightful herb bread, and I thought I'd share.

If you've been reading my blog for long, you know that I grow yeast starter. I like the flavor better, and it's cheaper than store bought yeast. So this bread is made from starter, and I explain how to make said starter here: http://lifebydanielle.blogspot.com/2011/09/pet-yeast.html


I keep my starter in the fridge so I don't have to use it every day, so before I made this bread I pulled the starter out of my fridge and let it warm up for a while until it was all bubbly again, then poured about 2 cups of starter into my mixing bowl.


Herbs from my garden. This is all that I used in the bread, and I made a lot of bread. Fresh herbs are quite strong.


Chop chop chop. And crack some pepper too.


Pile flour on the starter.


Add some herbs. And salt. And warm water. Not much water, just enough to make a shaggy but rather stiff dough.


Knead, knead, knead the dough until it is smooth and elastic.


Olive oil all over the dough and let it rise to double. Then shape the bread how you want it and let it rise to double again before baking it.
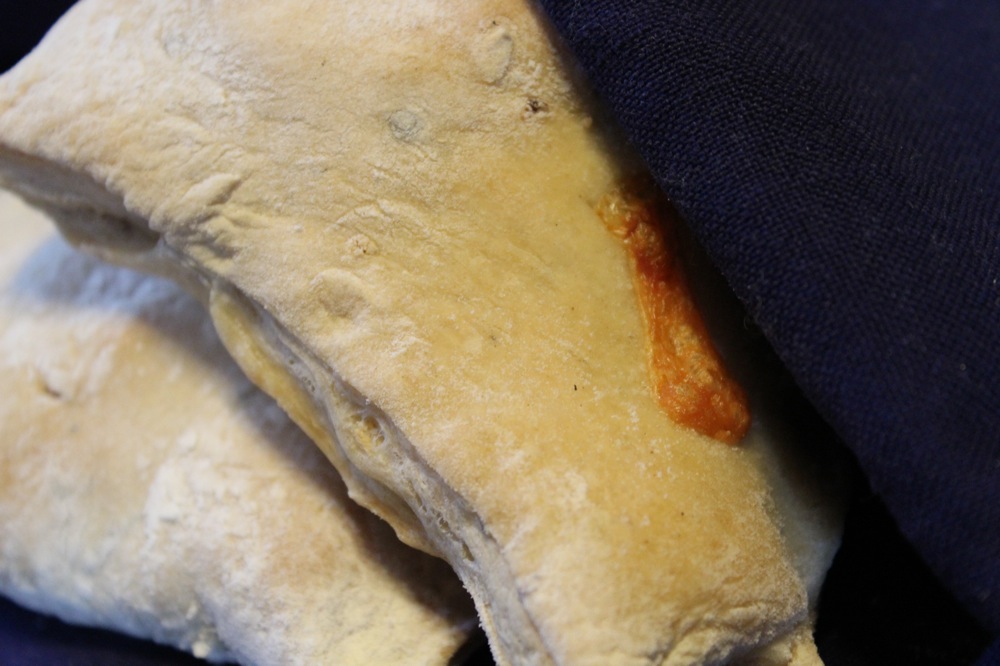
Now, I have no pictures of my first batch of bread, because, true to form, I forgot all about the bread in my oven and it became large croutons. But the rest of my dough became nommy, lovely calzones with cheese and ham and onions in the middle of it. And I do have pictures of those.


Herb Bread

2 c starter
some fresh herbs and cracked pepper and garlic
salt (about 1 to 2 tsp)
3 c flour
about 1/2 cup warm water

Chop up the herbs. Mix the starter, flour, herbs, and salt. Add enough water to make a stiff, shaggy dough. Knead until smooth and elastic, about ten minutes. Coat liberally with olive oil and let rise to double. Punch down and shape into bread loaves, calzones, etc. Allow to rise to double again.
Bake at 400 degrees F for about 20 minutes, or until slightly golden. Eat happily.


24.6.12

Dutch Babies (aka German Pancakes in a muffin tin)

No comments:

These are one of my favorite breakfast foods ever.
No, really, they really are.
Above French toast.
Above eggs.
Above bacon... well, that might be taking it a bit too far. There really isn't much above bacon.

But these little breakfast things are really good. I'm not completely sure how to describe them... if you have had yorkshire pudding, they are kind of like a sweet version of yorkshire pudding. But I don't know very many Americans who have had yorkshire pudding. They are kind of dense, eggy, salty, and sweet, very buttery, and delicious with fruit on top.What they actually are is Dutch or German pancakes, but made in muffin tins instead of a skillet, so they are little.  Just make them, and then you will know how good they are and I won't have to explain it!


I got this recipe, and adapted it a very little, from this blog.


Dutch Babies

6Tb melted butter
1 cup flour
1/3 cup sugar
1 tsp vanilla
1 tsp salt
1 cup milk
4 eggs

Preheat the oven to 375 degrees F. Then, mix together all your ingredients EXCEPT the butter... you can mix the dry ingredients and then add the wet ingredients if you want, or you can do it the other way around, or you can just dump all the ingredients in a bowl together and stir... I really don't care, it all works. The goal is to get it all mixed together, by whatever way makes you the most comfortable.

Add two tablespoons of the butter into the batter.
Now, take the rest of the butter (that is 4 tablespoons), and use it to grease a 12-muffin muffin tin. Use all the butter. there will be little pools of lovely warm golden butter on the bottom of every muffin tin. You want that. You want lots of butter. Butter is good.

Pour the batter into the muffin tins, but don't fill the tins too full. You want them to be about half  to three-quarters full, actually, with plenty of room to puff up to their full, delicious, puffy, butter glory.

Bake for 12-14 minutes, until they are all puffed up and the edges are golden. They will puff pretty high.


Pull them out of the oven, and let them cool a bit before pulling them out of the muffin tin and serving them with fruit on top... or jelly... or lemon juice and sugar... or berries... or whatsoever you desire to serve with these little pillows of deliciousness.


The centers will fall down, leaving the edges puffy, giving you a lovely little cup in which to hold the topping of your choosing.

You can make a large portion of the batter and then keep it in the fridge and cook only as many dutch babies as you want at the time... the batter keeps well in the fridge for at least a week. I'm not sure if it lasts longer... I usually use it all up within a week, and if I don't use it up in that time it's usually because I've forgotten about it, in which case I will continue to forget about it until it is far too late.

Happy Dutch Baby eating!


3.3.12

Buttermilk Biscuits

1 comment:


Well, it has been quite a while since I have posted on here... since before school started back up, actually.
You can blame school for the lack of postings. Turns out, 20 hours is actually quite the load of work. Keeps me kind of busy, most of the time.

In any case, I finally had a free-ish Saturday afternoon and was making biscuits and so I thought I'd take some pictures. And, I mean, once you take pictures you really do need to post them, right? Of course right.

I have been for quite some time now trying to find a perfect biscuit recipe. I love biscuits. LOVE them. But my homemade biscuits always have left a little something to be desired.
This recipe doesn't rise enough.
This one is too dense.
This one is too bitter (that is a problem with a lot of them. The baking powder makes them bitter.)
 My sourdough starter hates me, and I forget that it exists until it is so far past "sour" that it really isn't funny.
No, it isn't.
It's nasty.
But finally, recently, I found Biscuit Utopia. Beautiful Buttermilk Biscuits. They are not bitter. They rise like little puffy pillows of biscuity goodness. They are flaky and pull-apart-and-load-with-butter-able. (that is a very important biscuit characteristic). And they are easy to make. And I'm going to show YOU how to make them!!! Aren't you lucky.

I found and adapted this recipe from http://simplyrecipes.com/ which has lots and lots of wonderful noms.

Like all good biscuity recipes, you first mix together the dry ingredients. And then you ADD BUTTER. Or margarine. Margarine is cheaper. But butter is nommier. Is nommier a word?


Then you chop that butter all to pieces with your handy dandy butter chopper.
I use my butter-chopper a lot. That's why it's all bendy.
Bendy Butter-Choppers don't work as well as you might wish them to.
I need a new non-bendy butter-chopper. 


Now, don't chop the butter into too fine of pieces. You want that butter to be in big enough chunks that those chunks can turn into flaky bits of goodness later on. Chunks about the size of... medium-size chunks.
Maybe ranging from pea-size to thumb-size. Yeah, that's about right.
Then you add buttermilk!


Now, before this recipe I had never used real cultured buttermilk before. I found this on sale at Crest for 99 cents per half-gallon and I thought I'd try it. I really like it! I think that the buttermilk might be the secret of these biscuits' extreme goodness. I read online that you can make cultured buttermilk by mixing some store-bought cultured buttermilk with some regular milk and letting it sit out for a while, so I'm going to try that and we'll see if it works. I'll let you know. If I remember...

Anyway, moving on. You mix the buttermilk in, but don't over mix it! It will be very crumbly. This is good. Too much liquid makes the flour release gluten, which makes things chewy and will make your biscuits un-flaky and tough. Don't add too much, and don't mix too much.


Now, you are going to make flakes in your biscuits. Dust the counter with flour and dump your clumpy dough on the counter. It will try to fall apart. You are going to gently corral those clumps and press them lightly together and down into a sheet of crumbly goodness about two inches high.


Now, fold (I use the term loosely... more like, flop) the dough in half, and press gently down again to the same height. Do this about three or four times, until the dough starts to stick together better. This will make flakes in your biscuits. You are about done when the dough looks like this:


Remember, you aren't kneading the dough. You are gently flaking it. On the last turn, put some flour on the top of the dough before you fold it, and press it down to half the height you have been. Then fold it for the last time and just barely press it together. This last fold will create the half-way flaky point so that when you pull apart your fresh, warm biscuits, they will fall beautifully in half and await buttery goodness and honey and jam.

Now, cut out the biscuits. Press firmly straight down on your biscuit cutter (in my kitchen, that means "drinking glass that I use to cut biscuits with"). Don't twist the cutter or you will seal the edges of your biscuits, and they won't rise to full flaky glory. Set the biscuits on an ungreased cookie tray. Don't worry if they want to fall apart in half. Just stack those halves on top of each other and pretend like they are behaving.


Bake these at 450 degrees Fahrenheit for about 15 minutes, or until the tops are crispy golden brown.
Use a spatula to scrape them off the pan.
Add butter. Or jam. Or both. And honey.
And eat them all.
Or share.
Your choice. 


Buttermilk Biscuits

2 1/2 cups flour
1 Tb baking powder
2 tsp sugar
3/4 tsp salt
8Tb butter or margarine
1 cup buttermilk

Preheat oven to 450 degrees Fahrenheit.
Mix the flour, baking power, sugar, and salt.
Add the butter or margarine, and cut in until crumbly.
Add buttermilk. Mix until the dough clumps.
Turn out on floured counter, and press into 2-inch high sheet.
Fold and press, repeating until dough sticks together.
Fold one last time, pressing lightly together.
Cut out biscuits, place on ungreased cookie sheet.
Bake for 15- 20 minutes, or until tops are crispy golden brown.
Enjoy!

22.12.11

Fudgey Goodness

No comments:

I'm not normally a big fan of fudge.
It's usually just too sweet for me.
It seems like it is just pure, unadulterated sweetness with not much flavor, that gets stuck in my teeth and makes them hurt.
Sometimes I can stand a little bit if eaten alongside a large cup of black coffee...
but then I have a sugar rush AND a caffeine high, alongside my normally excitable personality, and well... that is just a combination that most of my friends want to avoid.
You should probably trust my friends on this one.
Right, friends?
BUT, this fudge worked its way right past my natural fudge-liking defenses, directly into that little place in my heart where sweet things reside.
You know... the sweet-things spot?
The place that pulls me back to the kitchen over and over and uses up copious amounts of sugar, flour, and butter.
The place that I've never heard my friends or family complain about as long as I share.
Yeah, that spot. 
This fudge is now there.


It is indeed very sweet, but it also has a hint of saltiness, and a hint of sour cream. It's good stuff. Really good stuff. Besides, with these ingredients, how can you possibly go wrong?


And because I love you, I'm going to tell you how to make this fudge without even using a candy thermometer!
Also because I'm too lazy to use a candy thermometer...
But that is totally beside the point, and not what we are discussing right now.
We are discussing fudge.
Stay on topic, please.


For the candy base, mix the sugar, margarine, and sour cream in a saucepan. Heat this to 234 degrees. OR, to "soft ball stage." What this means is, you let it boil for a very long time, stirring constantly. Check the mixture by taking a small spoonful on a metal spoon, and dunking it into a bowl of cold water. If it immediately swirls off of the spoon into the water, it is not done. If it sticks to the spoon completely, it's getting close. It is done when you can pull the candy off of the spoon in a little soft ball after dunking it in cold water. Hence, the name "soft ball stage."


See? Soft ball. Now turn off the heat.


Add the white chocolate.


And the marshmallow cream. Melt this yumminess in completely.


Then add the nuts.


And the dates. Mix them in well, then pour this yummy goop into your buttered pan, and let it cool.
No really, let it cool. 
Before you try to eat it. 
It's really hot. 
Burns your mouth. 
And fingers.


When it hardens into fudge, cut into cubes and eat it. With a big cup of black coffee. 


White Fudge

2 c sugar
3/4 c sour cream
1/2 c margarine
12 oz white chocolate (almond bark)
7 oz marshmallow cream
3/4 c chopped nuts
3/4 c chopped fruit (I used dates)

Mix sugar, sour cream, and margarine in saucepan and heat to 234 degrees, or soft ball stage.
Turn off heat and add white chocolate and marshmallow cream. Melt completely, then fold in nuts and fruit. Pour into buttered 9x9 pan and cool completely. Cut into pieces and serve.